A language file is available for each survey, allowing the full survey to be translated into a different language.
If you want to make a translation of your study, please follow these steps:
This is what you need:
- Your SurveyEngine account
- Your final survey (which you are going to translate)
- The translation file of your final survey (for more information open the following link)
- Libre Office, Excel or equivalent software
Step 1: Get the translation file
- Select the survey you want to translate. If you want to keep the current language and create a new version in a different language duplicate the original study accordingly before exporting the translation file; e.g.:
- Original study: health_preferences_eng
- Duplicated study for translation: health_preferences_ger
- Export the translation file from the Dashboard for the survey that you want to display in a different language. A UTF-8, tab-delimited “.csv” file will be downloaded.
Please note: You can not import a translation file into a different survey than the one you used to export it.
Step 2: Process the translation
- Open the .csv file in Libre Office, Excel or an equivalent software. It is important that the document is structured in columns and rows. Please note: new versions of excel do not correctly interpret this file type, when simply opening the file. Instead, please refer to the Excel instructions given at the end of this help document.
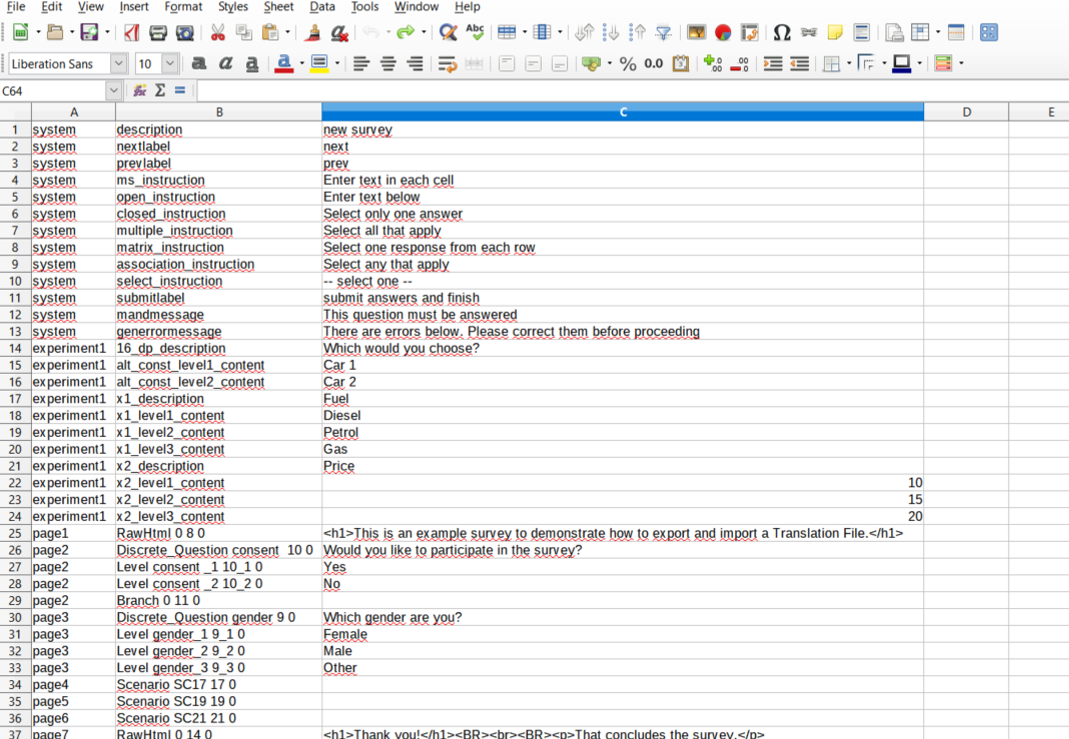
- In the third column you can change your translations manually for each line and per page (see description of the first two columns).
- It is very important that you only change the text bits in column 3. Do not change or delete anything in the system instructions (1 and 2 column), otherwise the survey will not work properly:
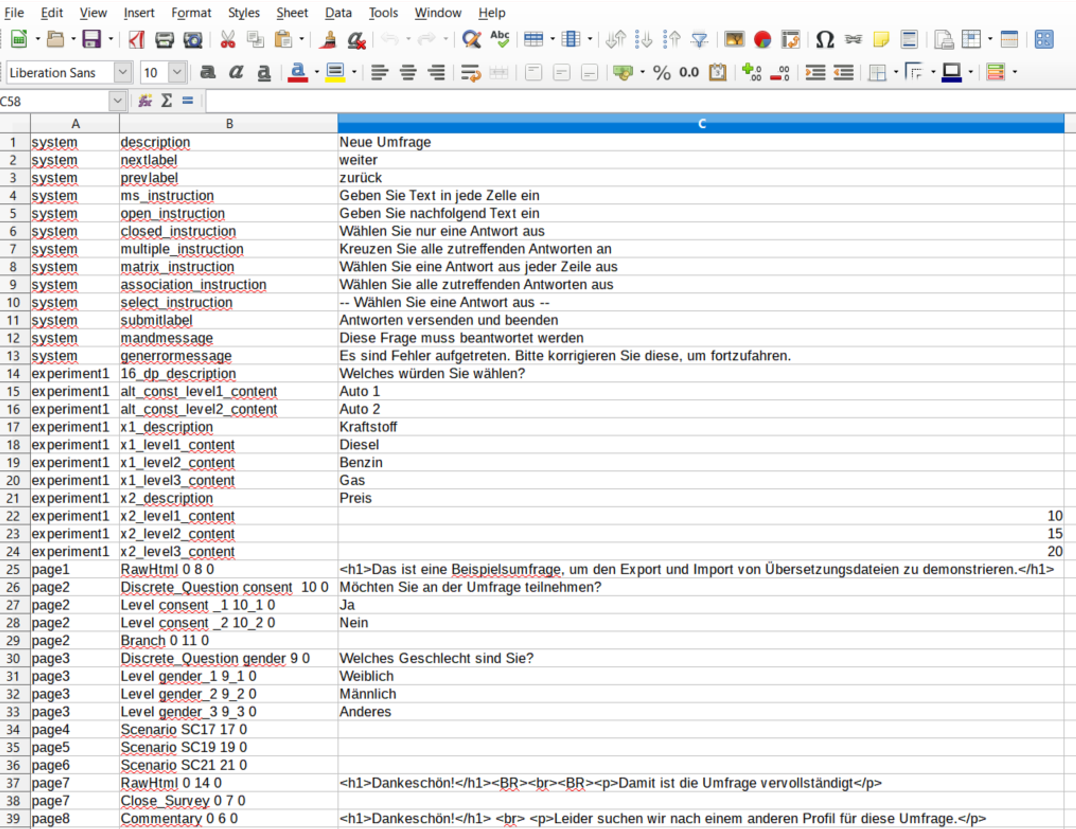
- If you are not sure which blocks refer to text, you can open the preview screen in parallel and compare the translation document with respondent view.
Step 3: Upload new translation file
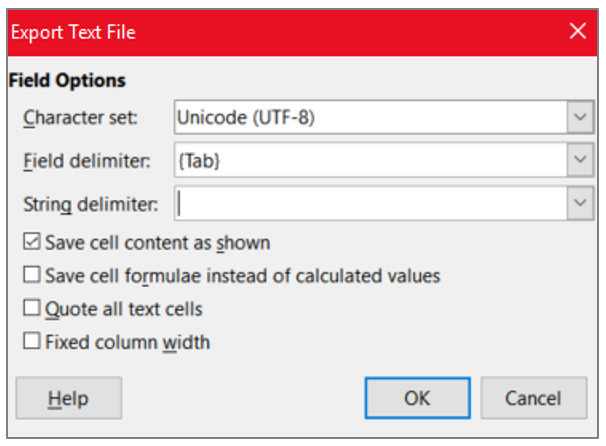
- After all translations are integrated, save your translated document as a .csv. Make sure that this new file is UTF-8, tab-delimited and that there is no string delimiter:
- Then import the translation (as .csv) into your survey:

- The survey will now be displayed in the translated version.
FAQ:
What happens if I add or delete questions?
If you delete a question or add a new element in the survey, you also have to do these changes in the translation file. Therefore, we recommend that you don't start the translation until the survey building is done. However, if you cannot avoid changes, you should adjust the survey in the Survey Builder, then export the translation file again, translate the changes afterwards and import the updated translation into your survey.
How do I translate an experiment?
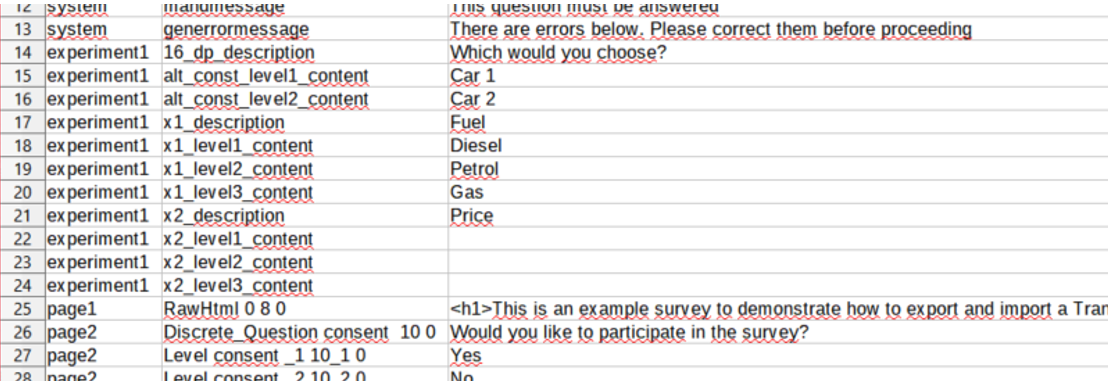
An experiment is also processed in the exported translation file. If you want to know which line corresponds to the experiment, look at the first two columns in the translation file, there is also the experiment setup described.
Additional: Instructions for excel users
- Open Microsoft Excel 2010 / 2007 / etc.
- Click on the “Data” menu bar option.
- Click on the “From Text” icon.
- Navigate to the location of the file that you want to import. Click on the filename and then click on the Import button. Make sure that the translation is a .csv file.
- Text Import Wizard window will now appear on the screen:
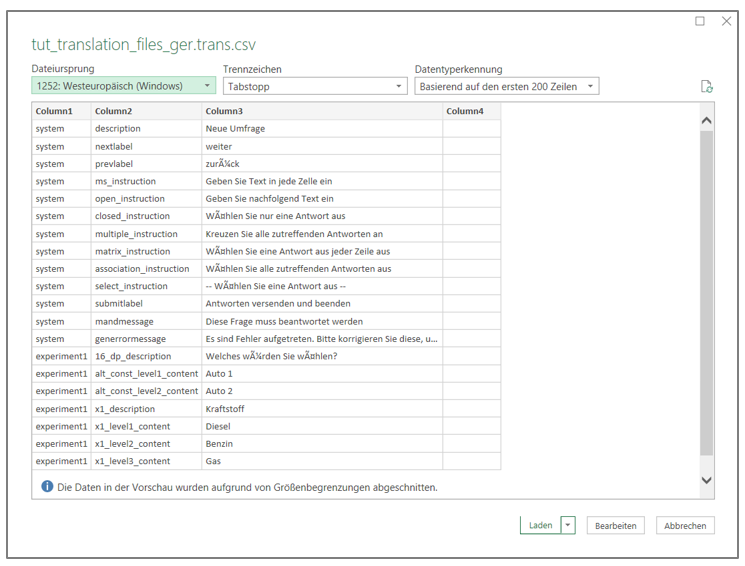
- Choose for file origin 65001: Unicode (UTF-8) and as delimiter Tab stop (otherwise non-Latin characters will appear erroneous as shown in the screenshot above.
- The Data preview window will show you how your data will appear.
- Click on the load button and a table will be generated
- Make sure that you only have 3 columns (remove redundant and empty columns, e.g. column 4) and double check if the “text” is selected as data format is selected:
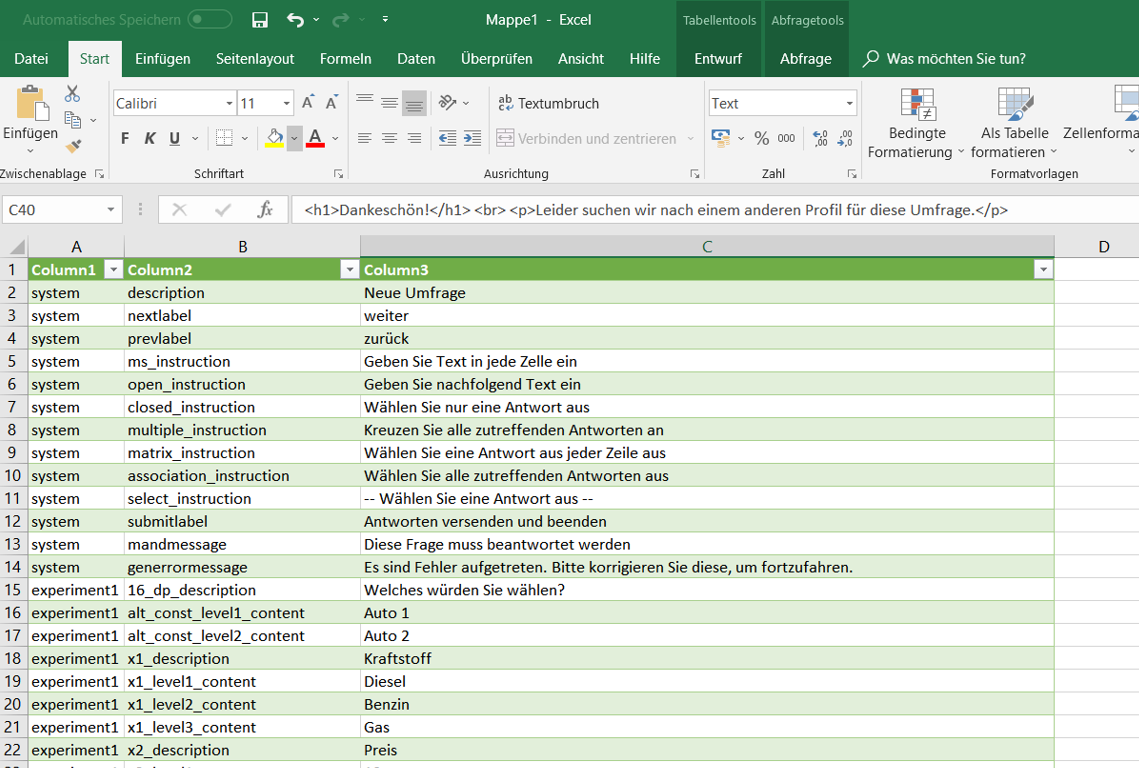
- Save the (into Excel) imported table as .csv
0 Comments